-1254x1254.png "MAGICART DIGITAL")
How to Color Paint by Numbers on a Tablet
Open. Color. Create.
No printer, paper, or physical kit required. Download your digital paint-by-numbers design, open it in a drawing app, and start coloring directly on your tablet.
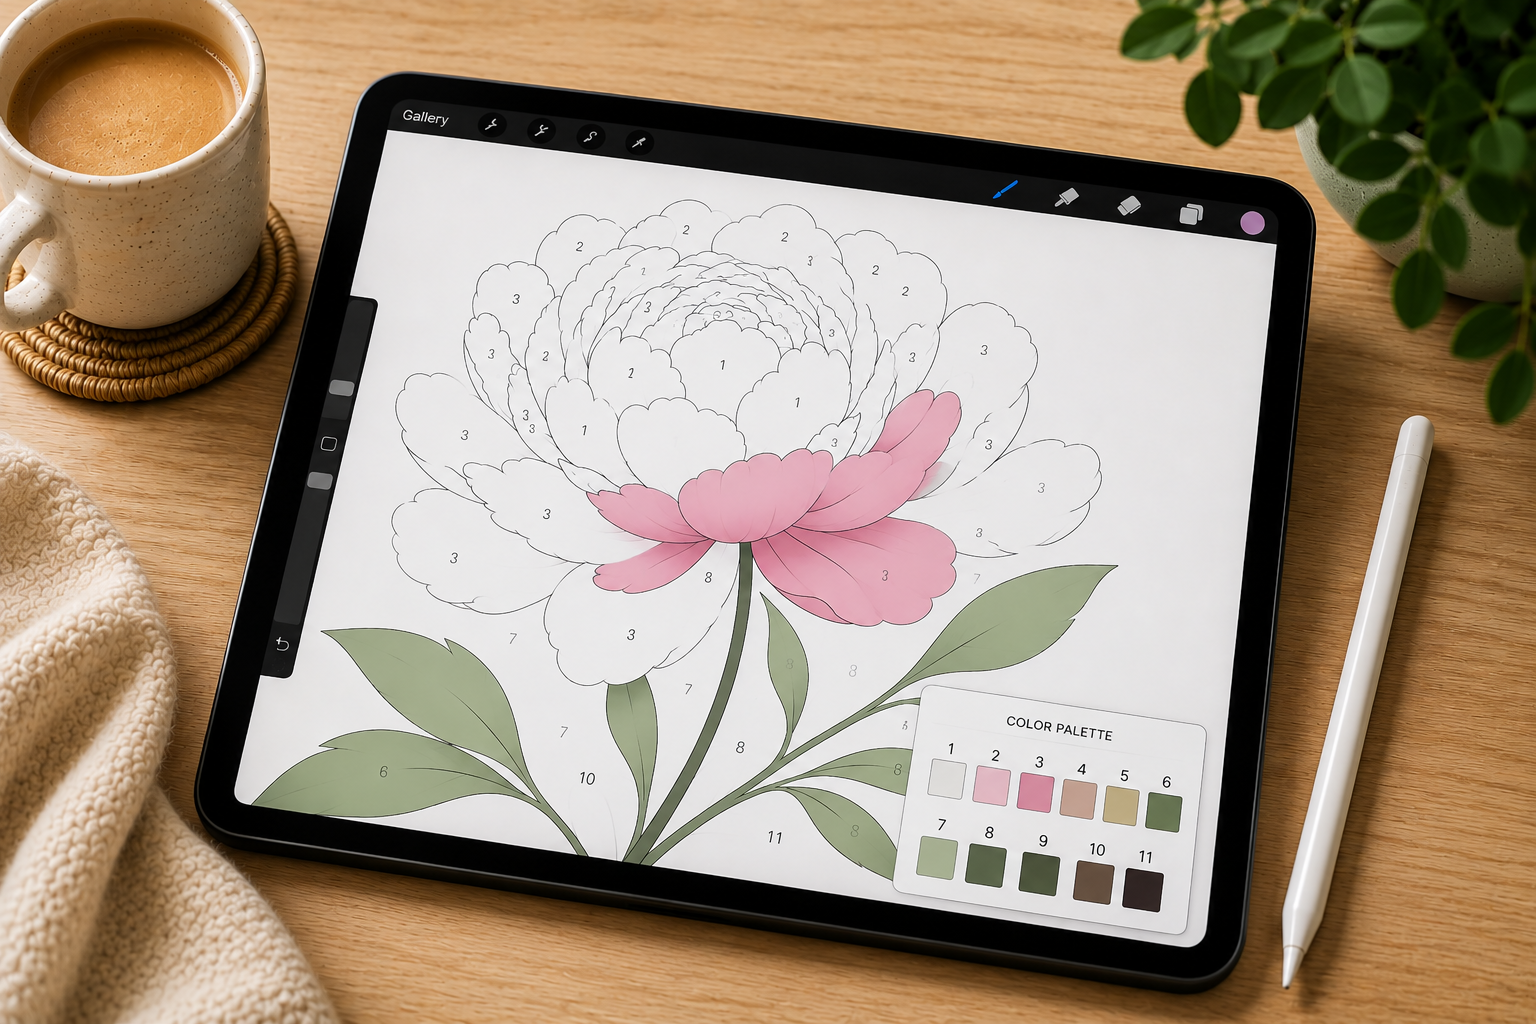
What do you need?
A tablet, a suitable drawing app, a stylus, and the files included with your MagicArt Digital design.
A tablet that supports a suitable digital drawing app.
Choose an app that supports PNG image import and layers.
Apple Pencil or another stylus compatible with your tablet.
Some drawing apps allow you to color using your finger. However, for paint-by-numbers designs we recommend using a stylus. It gives you much better control and precision, especially in smaller areas.
Choose a digital coloring app
You don't need to use one specific app. The important thing is that it allows you to import PNG images, zoom in on details, and work with layers.
If you don't already have a drawing app, you can start with one of the popular options below.
| App | iPad | Android | Good for |
|---|---|---|---|
| Procreate | Yes | No | Layers, brushes, and the included MagicArt .swatches palette. |
| ibisPaint X | Yes | Yes | A useful option for digital coloring, including Android devices. |
| Sketchbook | Yes | Yes | A clean interface and an easy option for beginners. |
| Adobe Fresco | Yes | No | Layers and a variety of digital drawing tools. |
You can use another drawing app if you prefer. Just make sure it supports PNG image import and layers.
Download the files you need
Your product contains several file formats because the same design can be used for both printing and digital coloring.
For this digital coloring method, you only need to focus on three files:
Your main numbered guide. This is the file you open first.
Use this color reference if you're coloring in an app other than Procreate.
Use this ready-made numbered palette if you're coloring in Procreate.
This is your main coloring guide. Once opened, you should see the outlines and numbers inside the individual areas.
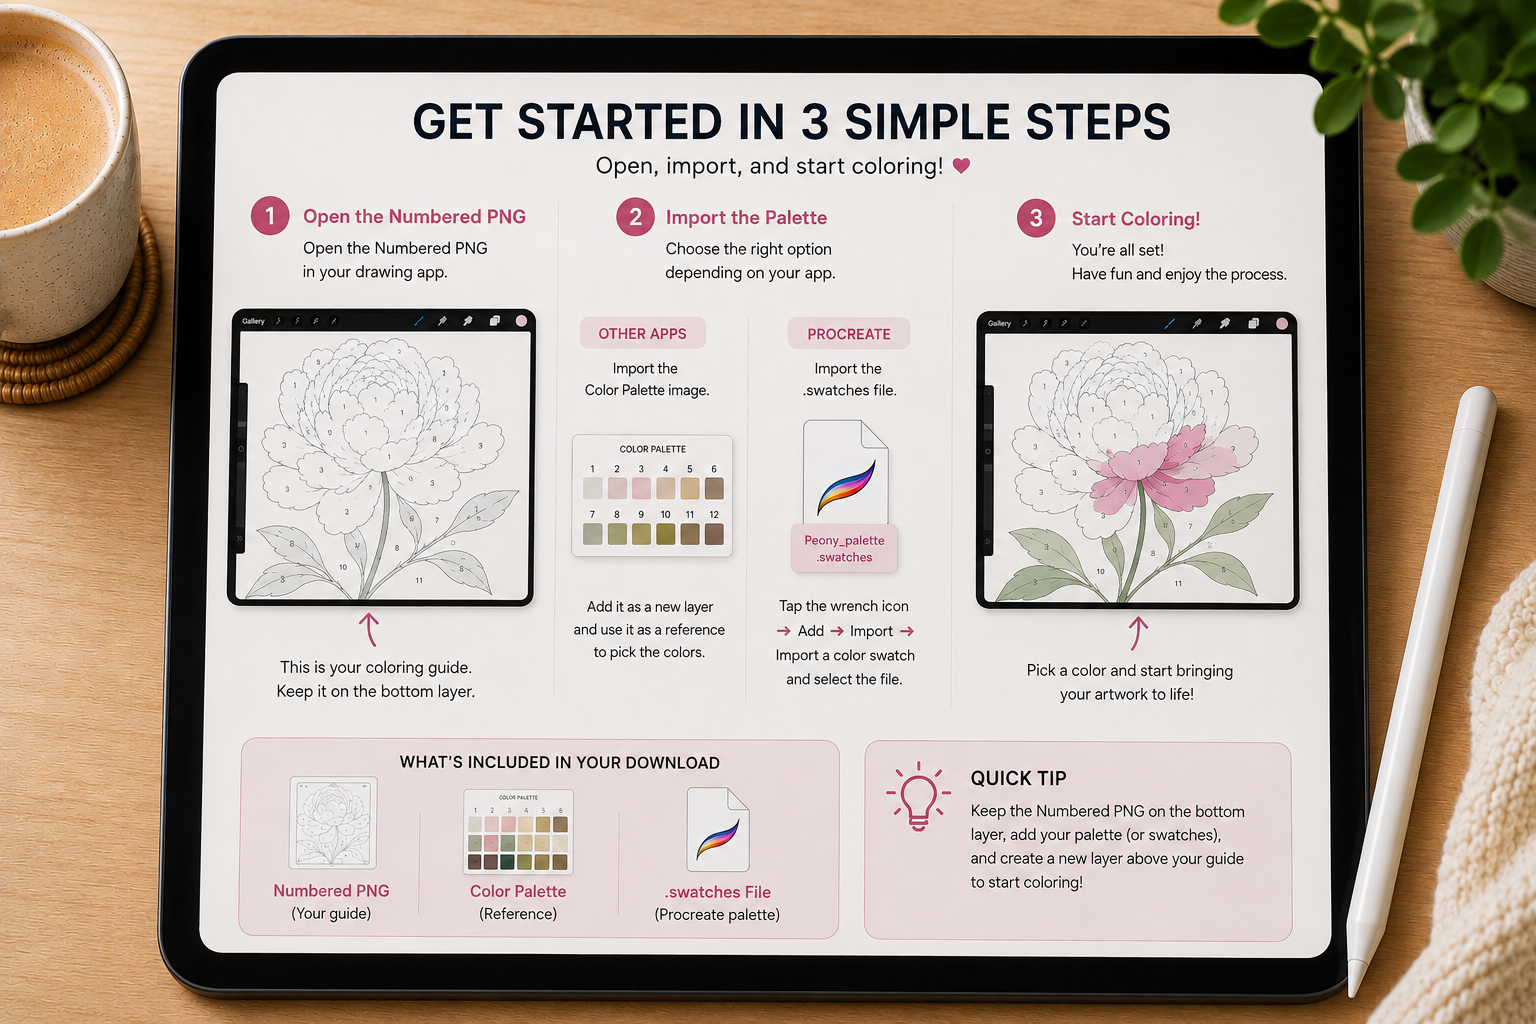
Open the Numbered PNG first. Then use the regular Color Palette in other apps, or import the included .swatches palette if you use Procreate.
Import the Numbered PNG into your drawing app
Open your drawing app and look for the option to add or open an image.
Depending on the app, the option may be called Import, Open, Add Photo, Insert Image, Import Image, or Open from Files.
Keep the original downloaded file unchanged and work on the copy created inside your drawing app.
Lock the guide and create a new layer
Keep your numbered guide on its own layer. If your app offers a Lock Layer option, lock the guide so you don't accidentally draw on it.
Then create a new blank layer above the Numbered Guide. This is the layer you will use for coloring.
Your original numbered guide stays unchanged, while your colors remain separate. If you make a mistake, you can correct it without affecting the guide underneath.
NUMBERED GUIDE underneath → COLOR HERE on the new layer above.
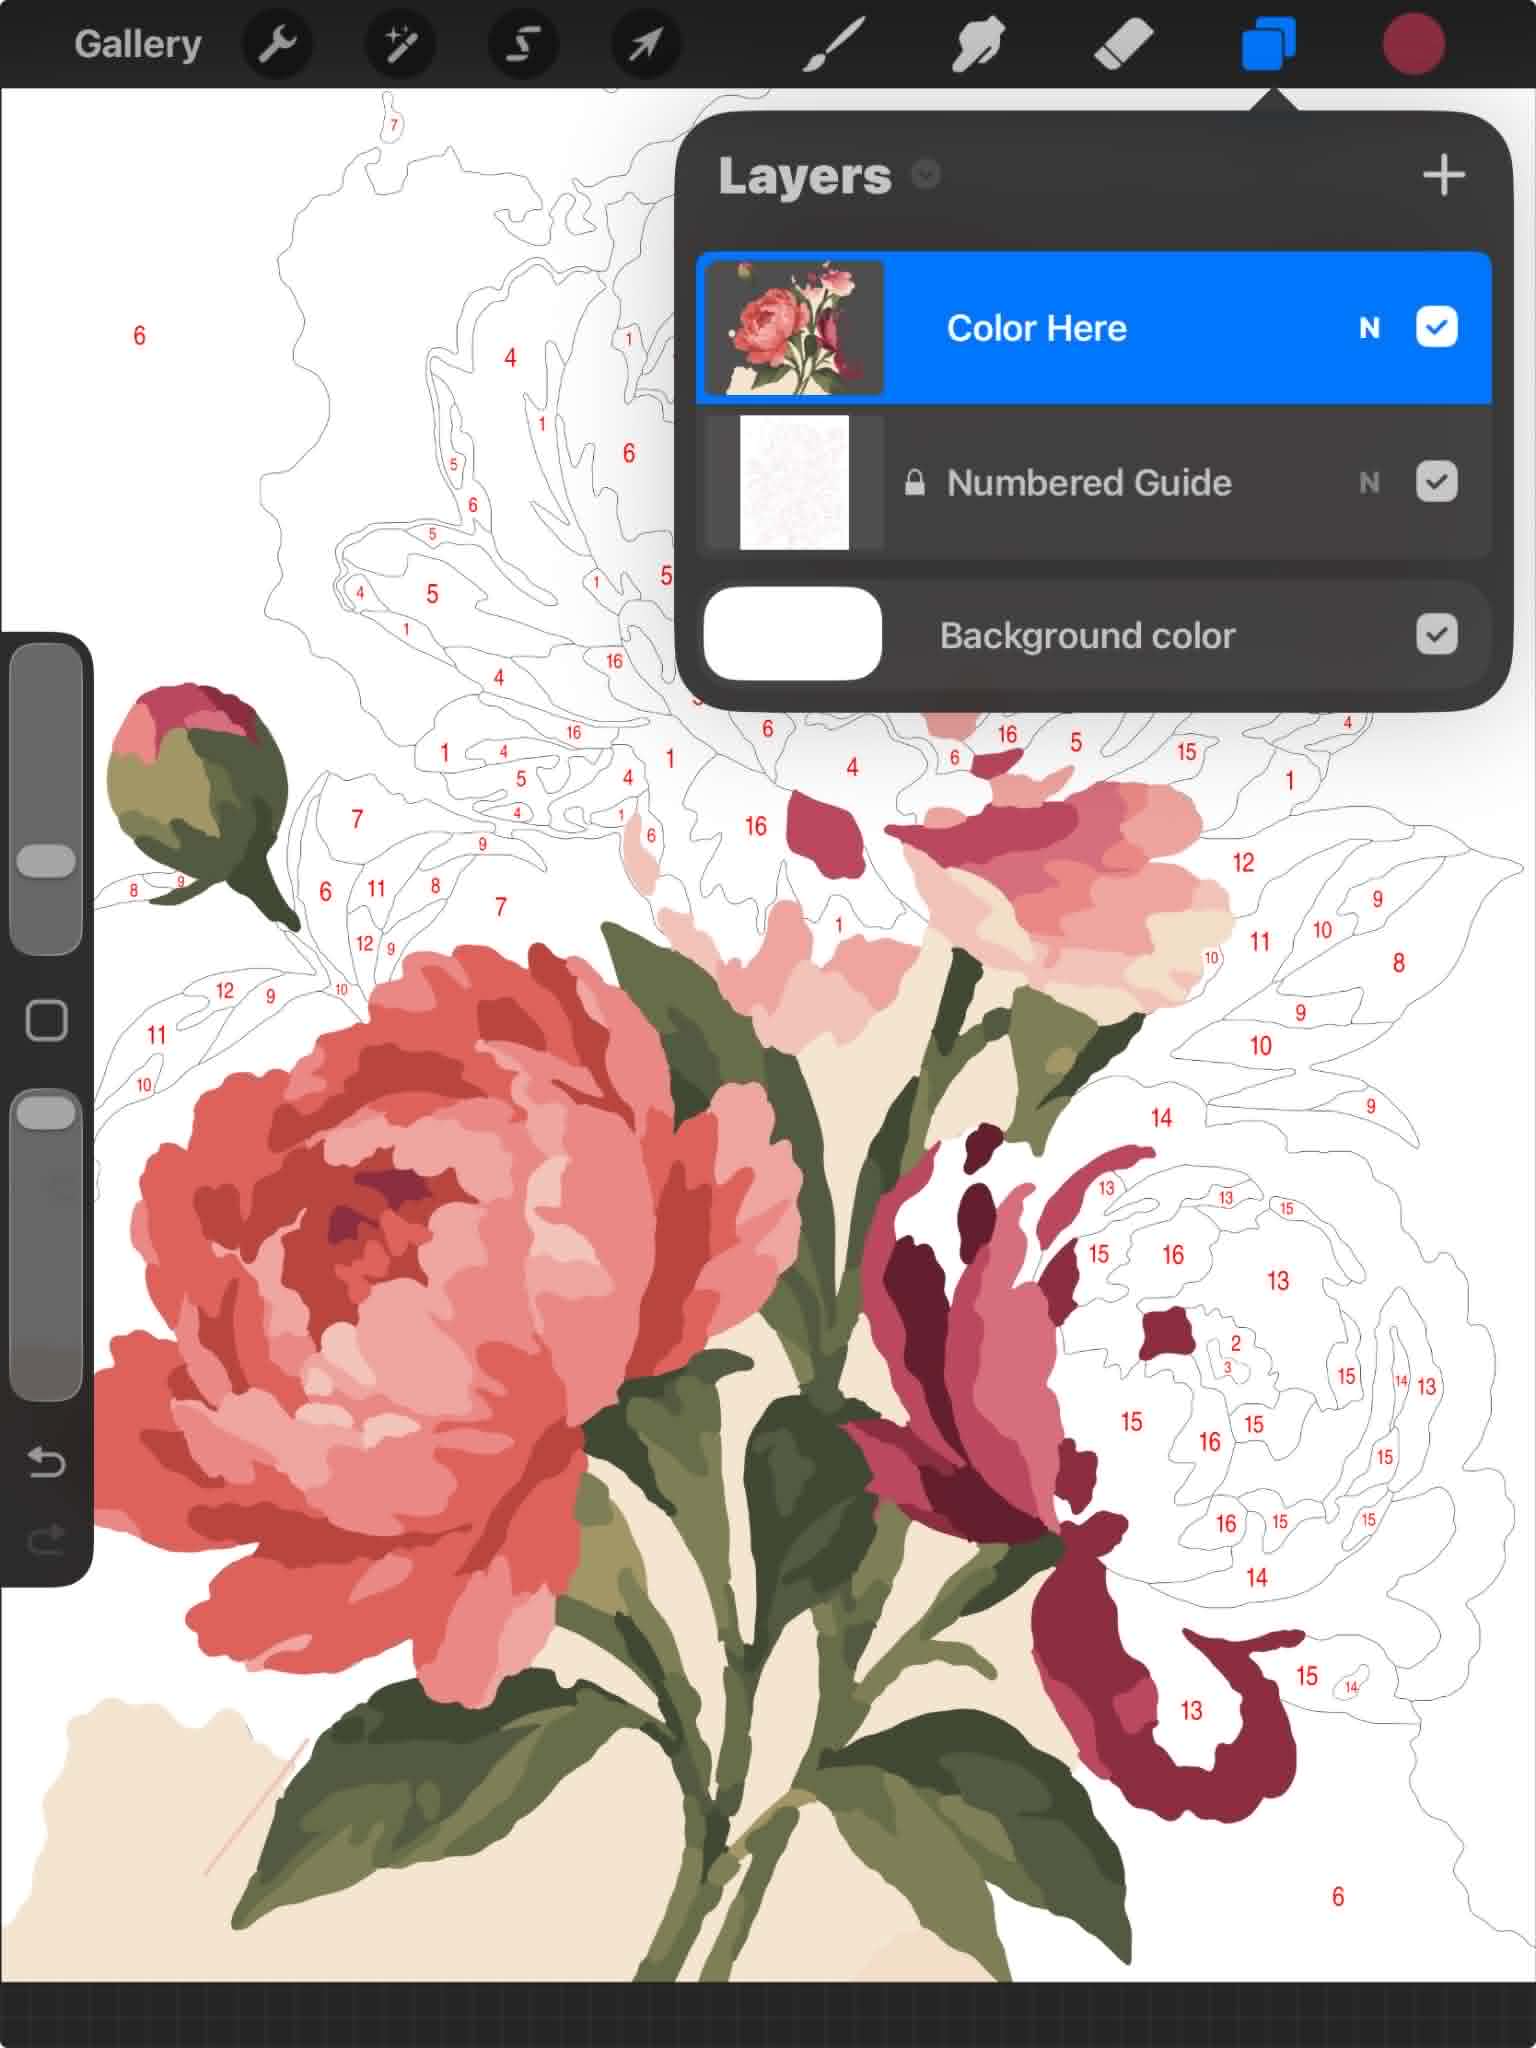
Keep the Numbered Guide locked underneath and color only on the new layer above it.
Import and choose your colors
Each number in the guide corresponds to a specific color. The way you load those colors depends on the app you're using.
Import the Color Palette
Import the included Color Palette image into your project and use your app's Color Picker / Eyedropper tool to select the matching colors.
Import the .swatches file
Import the included .swatches file. Your numbered colors will appear directly in Procreate's Palettes panel for easy access.
The number shown on each color card corresponds to the same number in your paint-by-numbers guide. Simply select the numbered color and start coloring the matching areas.
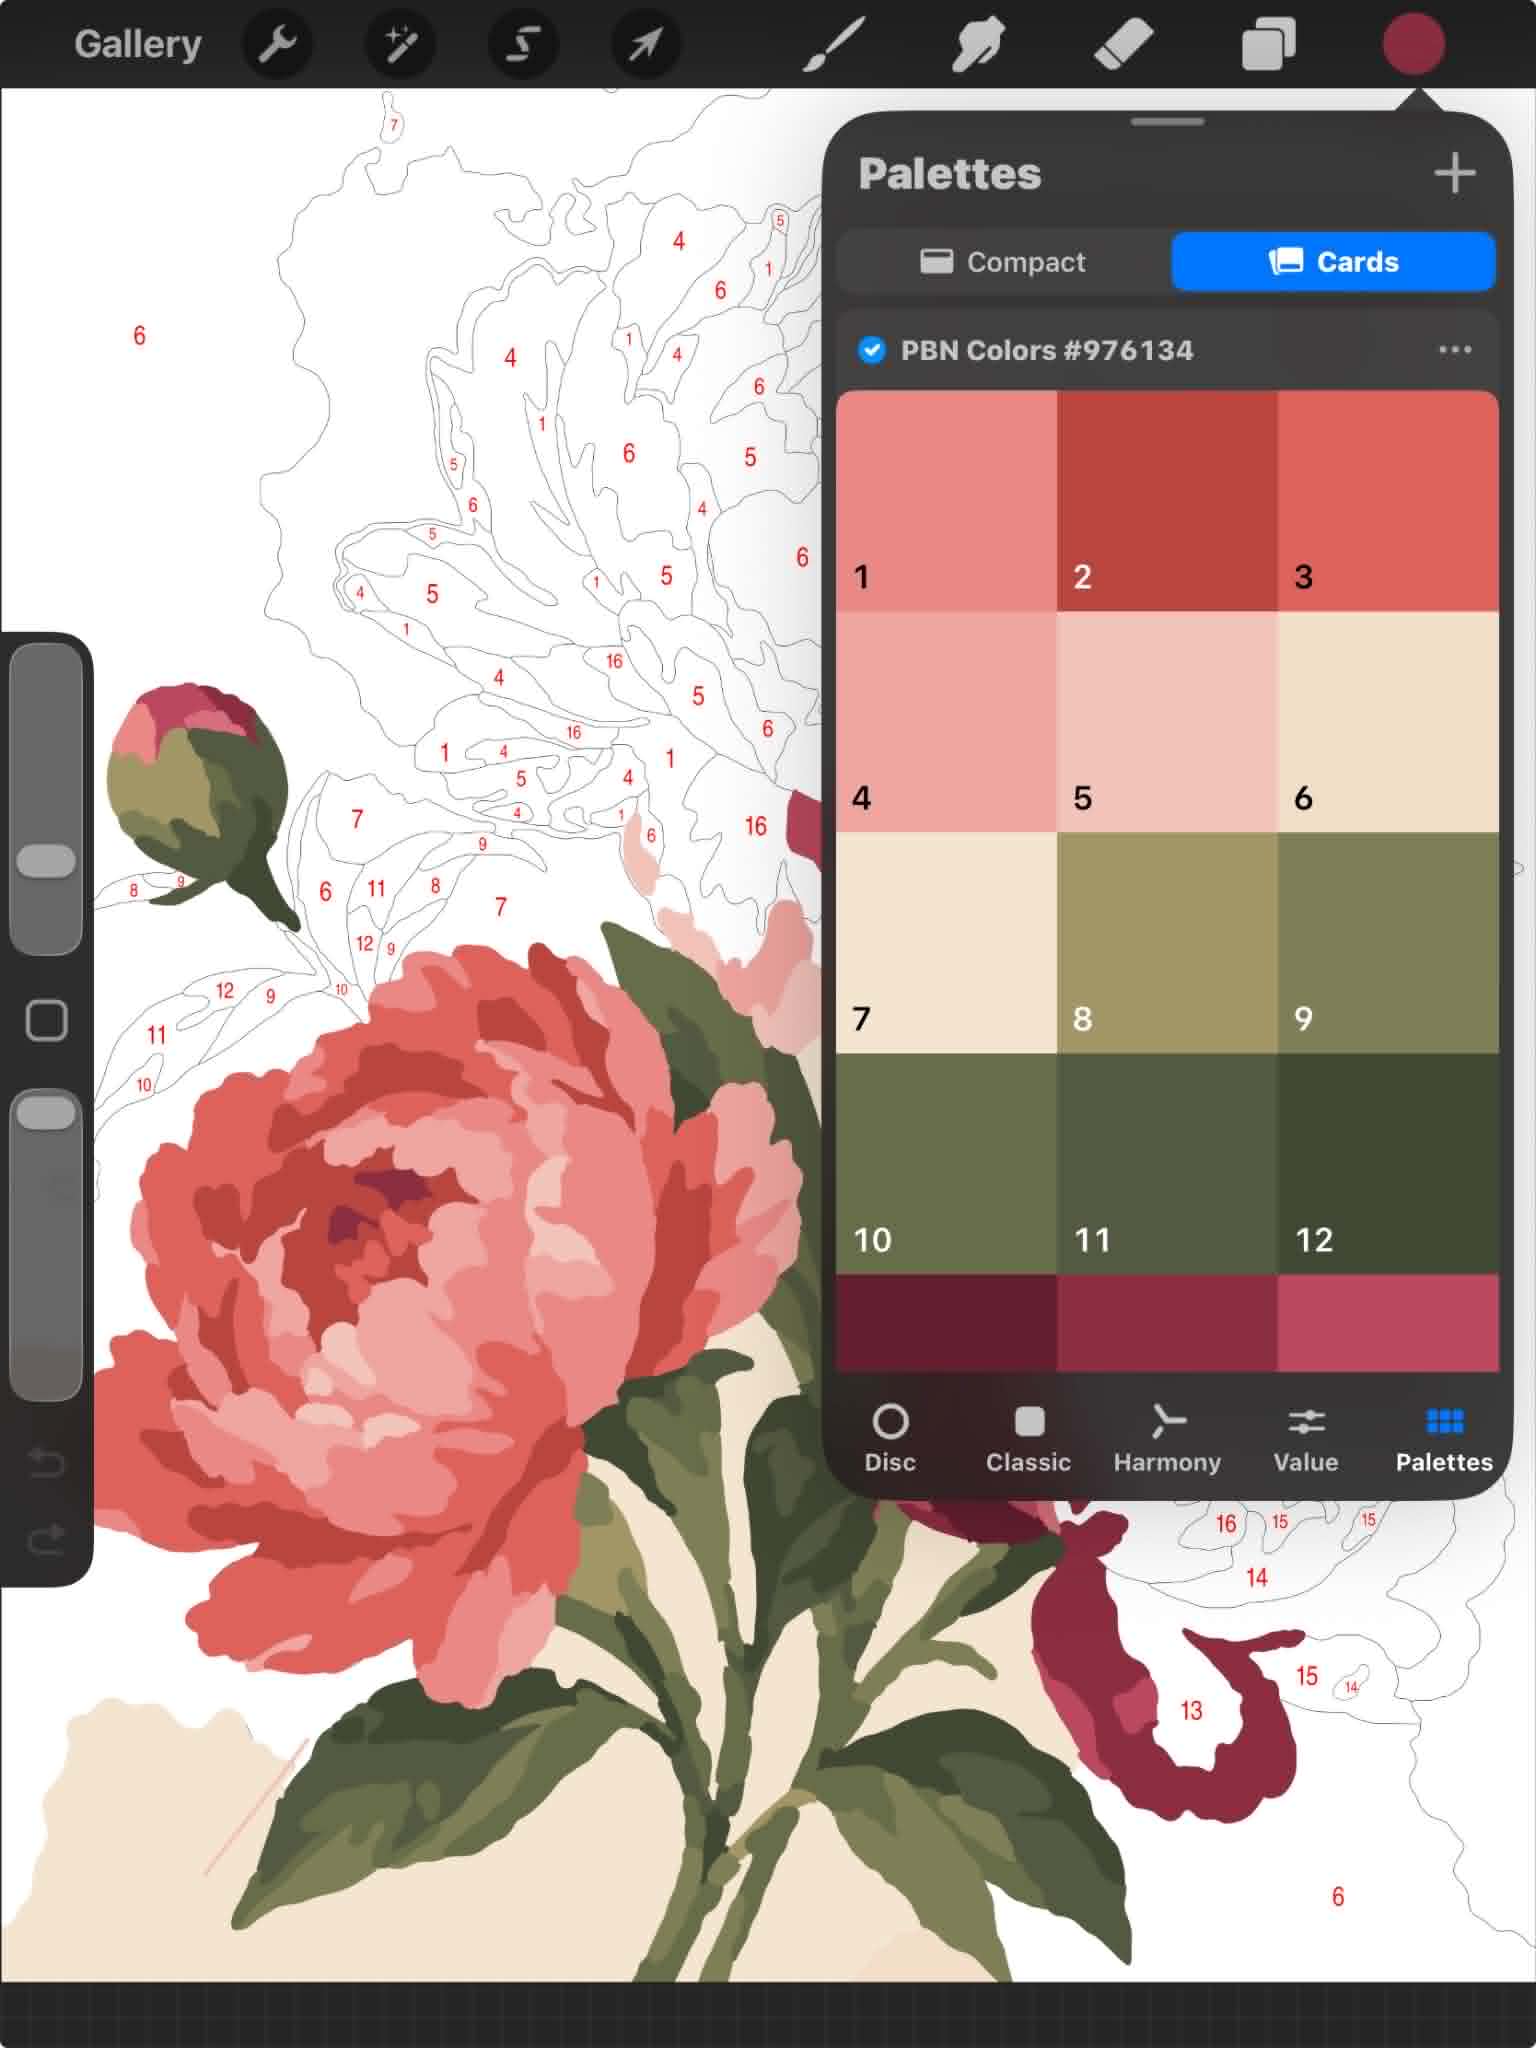
In Procreate, the included .swatches file gives you the numbered colors directly in the Palettes panel.
Start coloring with the brush
Choose a number from the guide, select its matching color, and begin coloring the area on your new Color layer.
Use a simple solid brush without texture. We recommend starting with 100% Opacity for clean and even color coverage.
Keep the numbered guide locked underneath. Uncolored areas will continue to show their numbers, while the areas you color on the upper layer become filled.
Zoom in and reduce the size of your brush. Digital coloring lets you work very precisely, even in smaller details.
Color one number at a time
An easy way to work is to choose one number and color all the areas that contain it. Then move on to the next color.
This means you switch colors less often and makes it easier to keep track of your progress.
You don't need to finish the design in one sitting. Save the project and continue from the same place whenever you want.
See how digital coloring works
Watch a quick example of coloring a MagicArt Digital paint-by-numbers design on a tablet.
Hide the numbered guide
Once you've finished coloring all of the areas, turn off the visibility of the locked Numbered Guide layer.
The guide disappears and your finished colored artwork remains visible.
Look over the artwork with the guide hidden. If you notice any small uncolored areas around the edges, return to the Color layer and finish them with the brush.
Save your finished artwork
Once you're happy with the result, export your finished artwork as a PNG or JPG.
Save it to Photos, Gallery, or Files on your device. We also recommend keeping your original working project with its layers in case you want to make changes later.
You now have your own finished digital artwork – without the numbered guide.
Using iPad + Procreate?
Every MagicArt Digital design includes a .swatches file for Procreate containing the colors for that specific artwork.
Once imported, the numbered colors are available directly in Procreate's Palettes panel, so you don't need to pick each shade manually.
You don't need Procreate to use MagicArt Digital. If you use another drawing app, import the included Color Palette image instead.
From your tablet to your wall
Your finished digital artwork doesn't have to stay on your screen. After saving it as a PNG or JPG, you can print it in full color on quality paper or cardstock.
Place the finished print in a frame and turn your digital coloring into beautiful home decor.
Tips for beginners
You don't need to know every tool in your drawing app. Start with the basics and experiment as you become more comfortable.
From numbered guide to finished artwork
the guide
the layer
a new layer
with the brush
the guide
your artwork
Grab your tablet and start creating
Choose a digital design, download your files, and start coloring wherever you are.
Explore Digital Paint by Numbers →Prefer coloring on paper?
View the Printing Guide →